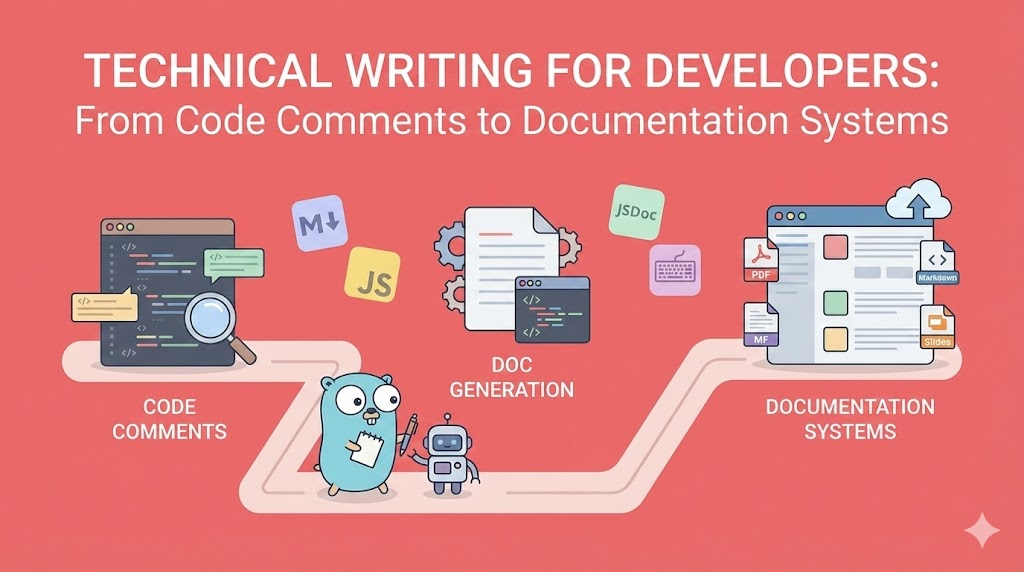
Technical Writing for Developers: From Code Comments to Documentation Systems
A comprehensive guide to technical writing in the dev industry. Master documentation strategies, automated doc generation, writing tools, grammar best practices, multi-format output (slides, PDFs, markdown), and building documentation that developers actually read and maintain.
Technical Writing for Developers: From Code Comments to Documentation Systems
Master the Art and Science of Documentation That Actually Gets Read
🎯 Introduction: Why Most Technical Documentation is Terrible (And How to Fix It)
Let me start with a harsh truth: Most technical documentation is garbage.
Not because developers can’t write. Not because they don’t try. But because they fundamentally misunderstand what technical writing is about.
The Documentation Paradox
What developers think technical writing is:
"Write down what the code does"

What technical writing actually is:
"Help someone understand a system without reading all the code"
The difference is profound. One is recording. The other is teaching.
Consider these two approaches:
// Approach 1: Recording what code does
/**
 * This function takes a user object and returns a boolean
 * It checks if user.age is greater than or equal to 18
 */
function canVote(user) {
  return user.age >= 18;
}

// Approach 2: Teaching why it exists
/**
 * Determines voter eligibility based on legal voting age.
 *
 * @param {User} user - The user to check
 * @returns {boolean} True if user meets minimum voting age (18)
 *
 * @example
 * canVote({ age: 20 }) // true
 * canVote({ age: 16 }) // false
 *
 * Note: Does not check citizenship or registration status.
 * Use `isRegisteredVoter()` for complete eligibility.
 */
function canVote(user) {
  return user.age >= 18;
}
The second approach:
- ✅ Explains purpose (voter eligibility)
- ✅ Provides context (legal voting age)
- ✅ Shows examples (actual usage)
- ✅ Clarifies limitations (what it doesn’t check)
- ✅ Links to related functionality (isRegisteredVoter)
This is the difference between documentation that gets ignored and documentation that gets used.
Why Documentation Fails
There are three main reasons technical documentation fails:
1. It’s Written for the Wrong Audience
Bad documentation assumes:
"The reader knows what I know"

Good documentation assumes:
"The reader is smart but unfamiliar with this specific system"

Example (bad):
"Call the API with the correct params"
(What's "correct"? What params? What API?)

Example (good):
"Send a POST request to /api/users with JSON body containing:
- username (string, 3-20 chars)
- email (valid email format)
- password (min 8 chars, 1 number, 1 special char)"
2. It’s Not Maintained
Day 1: Code and docs match perfectly
Day 30: Code evolved, docs still reference old API
Day 90: Code completely different, docs are fiction
Day 180: No one trusts the docs anymore

Result: Documentation death spiral
This happens because:
- Updating docs isn’t part of the Definition of Done
- No one reviews docs in PRs
- Docs live in a separate repo (friction)
- No automated validation that docs match code
3. It’s Hard to Find and Hard to Use
Bad documentation structure:
docs/
  README.md (2000 lines, everything)
  old_notes.txt
  some_random_file.md

Good documentation structure:
docs/
  getting-started/
    installation.md
    first-app.md
  api/
    authentication.md
    endpoints/
      users.md
      payments.md
  guides/
    deployment.md
    troubleshooting.md
  architecture/
    overview.md
    database-schema.md
  README.md (navigation hub)
What This Guide Covers
This is not a “how to write good sentences” guide. You can find that elsewhere.
This is: How to build a complete technical writing system that scales with your codebase.
We will cover:
✅ Documentation Types - What to document and when
✅ Writing Workspace - Tools, editors, and environment setup
✅ Grammar & Style - Clear technical writing patterns
✅ Automated Generation - Docs from code comments (JSDoc, TSDoc, Swagger, etc.)
✅ Multi-Format Output - Markdown → Slides, PDFs, Word, HTML
✅ Multi-Language Docs - Managing translations at scale
✅ Documentation Testing - Ensuring docs stay accurate
✅ AI-Assisted Writing - Using AI tools effectively
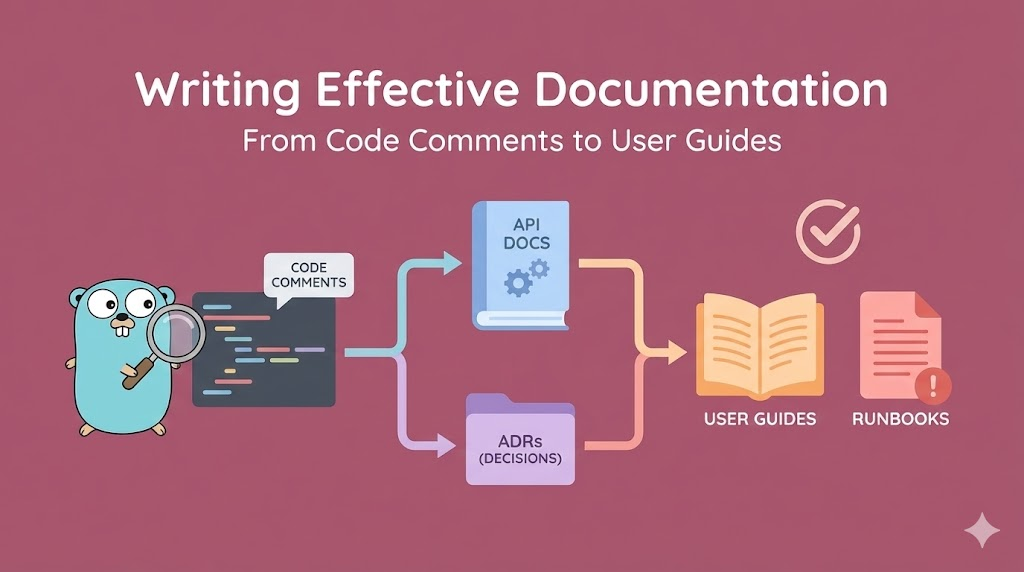
📚 Part 1: The Five Types of Technical Documentation (And When to Use Each)
Not all documentation is the same. Understanding the five types helps you write the right thing at the right time.
Type 1: Code Documentation (Comments & Docstrings)
Purpose: Explain WHY code exists and HOW to use it
Audience: Other developers working in the same codebase
Location: In the source code itself
Maintenance: Must be updated with every code change
When to use:
✅ DO document:
- Public APIs and functions
- Complex algorithms
- Non-obvious business logic
- Edge cases and gotchas
- Workarounds for bugs/limitations

❌ DON'T document:
- What the code obviously does
- Variable names that are self-explanatory
- Standard language features
Example of good code documentation:
/**
 * Calculates compound interest with monthly compounding.
 *
 * Uses the formula: A = P(1 + r/n)^(nt)
 * where:
 * - A = final amount
 * - P = principal (initial investment)
 * - r = annual interest rate (as decimal)
 * - n = number of times interest compounds per year
 * - t = time in years
 *
 * @param {number} principal - Initial investment amount in dollars
 * @param {number} rate - Annual interest rate (e.g., 0.05 for 5%)
 * @param {number} years - Investment duration in years
 * @returns {number} Final amount after compound interest
 *
 * @throws {Error} If principal is negative
 * @throws {Error} If rate is not between 0 and 1
 *
 * @example
 * // $1000 invested at 5% for 10 years
 * calculateCompoundInterest(1000, 0.05, 10)
 * // Returns: 1647.01
 *
 * @see https://www.investopedia.com/terms/c/compoundinterest.asp
 */
function calculateCompoundInterest(principal, rate, years) {
  if (principal < 0) {
    throw new Error("Principal cannot be negative");
  }
  if (rate < 0 || rate > 1) {
    throw new Error("Rate must be between 0 and 1");
  }

  const n = 12; // Monthly compounding
  return principal * Math.pow(1 + rate / n, n * years);
}
Why this works:
- Explains the mathematical formula (not obvious from code)
- Documents all parameters with units and constraints
- Provides real example with actual numbers
- Lists error conditions (helps with testing)
- Links to external reference (for deeper learning)
Type 2: API Documentation (External-Facing)
Purpose: Teach external developers how to integrate with your system
Audience: Third-party developers who don’t have access to your codebase
Location: Separate documentation site (often auto-generated)
Maintenance: Update whenever API changes (MUST be in sync)
Key components of API documentation:
1. Overview
   - What the API does (business value)
   - Authentication method
   - Rate limits
   - Base URL

2. Quick Start
   - Minimal working example
   - Common use case
   - Expected response

3. Endpoints Reference
   - HTTP method + path
   - Request parameters
   - Request body schema
   - Response schema
   - Status codes
   - Example requests/responses

4. Authentication
   - How to get credentials
   - How to include auth in requests
   - Token refresh flow

5. Error Handling
   - Error code reference
   - Common error scenarios
   - How to debug issues

6. Pagination/Filtering
   - How to paginate results
   - Query parameters for filtering
   - Sorting options

7. SDKs & Libraries
   - Official client libraries
   - Code examples in multiple languages

8. Changelog
   - Breaking changes
   - New features
   - Deprecations
Example of excellent API documentation:
## POST /api/v1/users

Create a new user account.

### Authentication

Requires API key in header: `Authorization: Bearer YOUR_API_KEY`

### Request Body

| Field     | Type   | Required | Description                     |
| --------- | ------ | -------- | ------------------------------- |
| username  | string | Yes      | 3-20 characters, alphanumeric   |
| email     | string | Yes      | Valid email format              |
| password  | string | Yes      | Min 8 chars, 1 number, 1 symbol |
| full_name | string | No       | User's full name                |

### Example Request

```bash
curl -X POST https://api.example.com/v1/users \
  -H "Authorization: Bearer sk_live_abc123" \
  -H "Content-Type: application/json" \
  -d '{
    "username": "johndoe",
    "email": "john@example.com",
    "password": "SecurePass123!",
    "full_name": "John Doe"
  }'
```
Example Response (201 Created)
{
  "id": "usr_abc123",
  "username": "johndoe",
  "email": "john@example.com",
  "full_name": "John Doe",
  "created_at": "2026-01-11T10:30:00Z",
  "email_verified": false
}
Error Responses
| Status | Code | Description |
|---|---|---|
| 400 | invalid_email | Email format is invalid |
| 409 | username_taken | Username already exists |
| 409 | email_taken | Email already registered |
| 422 | weak_password | Password doesn’t meet requirements |
Error Response Example (400)
{
  "error": {
    "code": "invalid_email",
    "message": "Email format is invalid",
    "field": "email"
  }
}
Rate Limiting
- 100 requests per minute per API key
- Returns
429 Too Many Requestswhen exceeded - Check
X-RateLimit-Remainingheader
Notes
- Email verification email sent automatically
- User cannot log in until email is verified
- Password is hashed using bcrypt (cost factor 12)
**Why this works:**
- **Complete specification** (no guessing)
- **Real examples** (copy-paste ready)
- **Error scenarios** documented (debugging help)
- **Rate limits** disclosed (prevents surprises)
- **Implementation notes** (security transparency)

### Type 3: Architecture Documentation (System Design)

**Purpose:** Explain how the system is structured and why
**Audience:** Senior developers, architects, new team members
**Location:** Usually in `/docs` folder or wiki
**Maintenance:** Update when architecture changes significantly

**Key components:**
-
System Overview
- High-level diagram
- Main components
- Key technologies
-
Architecture Decisions (ADRs)
- Why we chose X over Y
- Trade-offs considered
- Date and context
-
Data Flow
- How data moves through system
- Request lifecycle
- State management
-
Infrastructure
- Deployment architecture
- Scaling strategy
- Disaster recovery
-
Security Model
- Authentication flow
- Authorization model
- Data encryption
-
Integration Points
- External APIs we call
- External services that call us
- Message queues/events
**Example of Architecture Decision Record (ADR):**

```markdown
# ADR 001: Use PostgreSQL for Primary Database

## Status
Accepted (2026-01-05)

## Context
We need to choose a primary database for our e-commerce platform.

Requirements:
- ACID transactions (money is involved)
- Complex queries (joins, aggregations)
- JSON support (flexible product attributes)
- Strong consistency (inventory management)
- Proven at scale (not experimental)
- Team familiarity (reduce learning curve)

Options considered:
1. PostgreSQL
2. MySQL
3. MongoDB
4. DynamoDB

## Decision
We will use PostgreSQL 15 as our primary database.

## Rationale

**Why PostgreSQL:**
- ✅ ACID compliance (critical for financial transactions)
- ✅ Excellent JSON support (JSONB type)
- ✅ Rich query capabilities (window functions, CTEs)
- ✅ Team has 5 years experience with it
- ✅ Great tooling (pgAdmin, DBeaver, Table Plus)
- ✅ Proven at scale (used by Instagram, Reddit)
- ✅ Strong community and ecosystem

**Why not MySQL:**
- Weaker JSON support
- Less advanced query features
- No significant advantages for our use case

**Why not MongoDB:**
- No ACID transactions across documents (at the time)
- Eventual consistency risks for inventory
- Team unfamiliar with document modeling

**Why not DynamoDB:**
- Complex pricing model (unpredictable costs)
- Query limitations (no joins)
- Vendor lock-in concerns
- Overkill for our current scale

## Consequences

**Positive:**
- Fast development (team expertise)
- Reliable transactions (money safety)
- Flexible schema (JSONB for product attributes)

**Negative:**
- Vertical scaling limits (though high)
- Must manage database operations (backups, replication)
- Not as "cloud-native" as DynamoDB

**Mitigation:**
- Use managed PostgreSQL (RDS or similar)
- Plan for read replicas when scale demands
- Document operational procedures

## Review Date
2027-01-05 (review in 1 year or when we hit 1M users)
Why ADRs are powerful:
- Captures context (future you won’t remember why)
- Documents trade-offs (no decision is perfect)
- Prevents revisiting (don’t relitigate every 6 months)
- Onboarding tool (new devs understand history)
Type 4: User Guides & Tutorials (Learning Resources)
Purpose: Teach users/developers how to accomplish specific tasks
Audience: End users, junior developers, anyone learning the system
Location: Documentation site, blog, video tutorials
Maintenance: Update when features change or user feedback indicates confusion
Structure of a good tutorial:
1. What You'll Build
   - Clear outcome
   - Why it's useful
   - Prerequisites

2. Step-by-Step Instructions
   - Numbered steps
   - One action per step
   - Screenshots/code samples

3. Explanation
   - Why each step matters
   - What's happening under the hood
   - Common mistakes

4. Next Steps
   - Related tutorials
   - Advanced topics
   - Additional resources
Example tutorial structure:
# Building Your First Payment Integration

## What You'll Build

By the end of this tutorial, you'll have:

- A working payment form
- Integration with Stripe API
- Webhook handler for payment confirmations
- Basic error handling

Time: ~30 minutes

## Prerequisites

- Node.js 18+ installed
- Stripe account (free tier is fine)
- Basic JavaScript knowledge

## Step 1: Install Dependencies

```bash
npm install stripe express body-parser
```
What this does:
stripe- Official Stripe SDK for Node.jsexpress- Web server frameworkbody-parser- Parses incoming JSON
Step 2: Set Up Stripe
Create a .env file:
STRIPE_SECRET_KEY=sk_test_your_key_here
STRIPE_PUBLISHABLE_KEY=pk_test_your_key_here
⚠️ Important: Never commit your secret key to Git!
Get your keys from: https://dashboard.stripe.com/apikeys
Step 3: Create Payment Intent Endpoint
Create server.js:
const express = require("express");
const stripe = require("stripe")(process.env.STRIPE_SECRET_KEY);

const app = express();
app.use(express.json());

app.post("/create-payment-intent", async (req, res) => {
  const { amount } = req.body;

  try {
    const paymentIntent = await stripe.paymentIntents.create({
      amount: amount, // in cents
      currency: "usd",
    });

    res.json({ clientSecret: paymentIntent.client_secret });
  } catch (error) {
    res.status(400).json({ error: error.message });
  }
});

app.listen(3000, () => console.log("Server running on port 3000"));
What’s happening here:
- We import Stripe SDK with your secret key
- Create Express app with JSON parsing
- Define POST endpoint at
/create-payment-intent - Create a PaymentIntent (Stripe’s way of tracking a payment)
- Return client secret (frontend uses this to complete payment)
Why this pattern:
- Keeps secret key on server (secure)
- Frontend never sees sensitive data
- Stripe handles PCI compliance
Step 4: Test It
Run the server:
node server.jsTest with curl:
curl -X POST http://localhost:3000/create-payment-intent \
  -H "Content-Type: application/json" \
  -d '{"amount": 1000}'
Expected response:
{
  "clientSecret": "pi_abc123_secret_xyz789"
}
✅ Success! You’ve created your first payment intent.
Common Issues
Issue: “No such token: sktest…”
Solution: Check your .env file exists and has correct key.
Issue: “Amount must be at least $0.50”
Solution: Use amount of 50 or higher (Stripe requires minimum).
Issue: “Invalid API Key”
Solution: Make sure you copied the full key from Stripe dashboard.
Next Steps
Now that you have a working payment intent endpoint:
Additional Resources
**Why this tutorial works:**
- **Clear outcome** (you know what you're building)
- **Incremental steps** (one thing at a time)
- **Explanations included** (understand, don't just copy)
- **Error handling** (common issues documented)
- **Next steps** (path forward)

### Type 5: Runbooks & Operational Documentation

**Purpose:** Help people operate and troubleshoot the system in production
**Audience:** DevOps, SRE, on-call engineers
**Location:** Internal wiki, operations manual
**Maintenance:** Update after every incident or procedure change

**Structure of a runbook:**
-
Alert/Issue Description
- What triggers this
- Symptoms
- Severity
-
Immediate Actions
- First things to check
- Quick fixes
- Escalation criteria
-
Investigation Steps
- Where to look
- Commands to run
- What to check
-
Resolution Steps
- Step-by-step fix
- Verification
- Rollback procedure
-
Post-Resolution
- Monitoring to watch
- Follow-up tasks
- When to file incident report
**Example runbook:**

```markdown
# Runbook: High Database CPU Alert

## Alert Details
**Trigger:** RDS CPU > 80% for 5 minutes
**Severity:** P2 (service degradation)
**On-Call Team:** Backend
**Slack Channel:** #alerts-production

## Immediate Actions (First 5 Minutes)

### 1. Check Current Status

```bash
# Check RDS metrics
aws cloudwatch get-metric-statistics \
  --namespace AWS/RDS \
  --metric-name CPUUtilization \
  --dimensions Name=DBInstanceIdentifier,Value=prod-db \
  --start-time $(date -u -d '30 minutes ago' +%Y-%m-%dT%H:%M:%S) \
  --end-time $(date -u +%Y-%m-%dT%H:%M:%S) \
  --period 300 \
  --statistics Average
2. Check if Service is Degraded
- Visit https://app.example.com (check responsiveness)
- Check APM dashboard: https://datadog.com/dashboard/prod
- Look for increased error rates in logs
3. Quick Mitigation (if service is degraded)
# Kill long-running queries (if any)
# Connect to DB
psql -h prod-db.xyz.rds.amazonaws.com -U admin -d production

# Find long queries
SELECT pid, now() - query_start AS duration, query
FROM pg_stat_activity
WHERE state = 'active' AND now() - query_start > interval '30 seconds'
ORDER BY duration DESC;

# Kill problematic queries (use PID from above)
SELECT pg_terminate_backend(12345);
⚠️ Before killing queries:
- Screenshot the query for post-mortem
- Only kill if duration > 5 minutes
- Never kill queries from
replicationuser
Investigation Steps
Check 1: Slow Query Log
# Download slow query log
aws rds download-db-log-file-portion \
  --db-instance-identifier prod-db \
  --log-file-name slowquery/postgres.log \
  --output text > slow_queries.log

# Analyze
cat slow_queries.log | grep "duration:" | sort -n
Look for:
- Queries taking > 1000ms
- Same query appearing many times
- Missing index warnings
Check 2: Connection Count
SELECT count(*) as connection_count
FROM pg_stat_activity
WHERE state != 'idle';
Normal: < 50 connections
Warning: 50-100 connections
Critical: > 100 connections
If > 100:
- Check application servers (are they opening too many connections?)
- Check connection pool configuration
- Consider scaling up database
Check 3: Table Bloat
SELECT
  schemaname,
  tablename,
  pg_size_pretty(pg_total_relation_size(schemaname||'.'||tablename)) AS size
FROM pg_tables
ORDER BY pg_total_relation_size(schemaname||'.'||tablename) DESC
LIMIT 10;
If tables are unexpectedly large:
- Consider running VACUUM ANALYZE
- Check for missing indexes
- Review query patterns
Resolution Steps
Scenario 1: Slow Query Identified
-
Identify the query causing issues
-
Check if query can be optimized (add index, rewrite)
-
If immediate fix not possible:
- Scale up database temporarily
- Add rate limiting to the endpoint
- Contact team that owns the query
-
Create follow-up ticket for permanent fix
Scenario 2: Too Many Connections
-
Check application connection pool settings:
// Should be in app config pool: { max: 20, // per instance min: 5, idle: 10000 } -
If connection pool properly configured:
- Check for connection leaks in code
- Scale up application servers (not database)
-
Temporary fix:
-- Increase max connections (requires reboot)
ALTER SYSTEM SET max_connections = 200;
-- Reboot RDS instance
Scenario 3: Database Needs Scaling
If investigation shows consistent high load:
-
Create RDS snapshot (just in case)
-
Scale up instance class:
- Current: db.t3.large
- Scale to: db.t3.xlarge
-
Scaling causes ~1 minute downtime
- Do during low traffic
- Notify team in #engineering
-
Monitor for 30 minutes after scaling
Verification
After resolution:
- CPU should drop below 50% within 10 minutes
- Application response times return to normal (< 200ms p95)
- No error rate increase
- Run smoke tests:
npm run smoke-test-prod
Post-Resolution
Monitoring (next 24 hours)
- Watch CPU metrics every hour
- Check slow query log tomorrow morning
- Review application logs for errors
Follow-Up Tasks
- Create post-mortem document if downtime occurred
- File ticket for identified optimizations
- Update this runbook if you learned something new
Escalation
Escalate to senior engineer if:
- CPU remains > 80% after 30 minutes
- Unable to identify root cause
- Service degradation continues
- Multiple systems affected
Senior On-Call: Check #oncall-schedule
Related Runbooks
**Why this runbook works:**
- **Action-oriented** (tells you exactly what to do)
- **Commands included** (no need to remember syntax)
- **Decision trees** (different scenarios handled)
- **Time-sensitive** (prioritizes immediate actions)
- **Learning tool** (explains what to look for)

---

## 🛠️ Part 2: Building Your Technical Writing Workspace

Let's talk about the actual tools and environment for writing great documentation.

### The Four-Layer Writing Stack

Good technical writing requires a **layered toolset**:
Layer 1: Writing Environment (where you write) Layer 2: Syntax & Formatting (how you structure content) Layer 3: Generation & Automation (how you generate docs from code) Layer 4: Publishing & Distribution (how you share docs)
Let's go through each layer.

### Layer 1: The Writing Environment

This is where you spend your time writing. Choice matters.

#### Option 1: VS Code (The Developer's Choice)

**Why developers love it:**
- Same environment as coding (no context switching)
- Extensions for everything
- Git integration built-in
- Markdown preview in real-time

**Essential VS Code extensions for technical writing:**
-
Markdown All in One
- Keyboard shortcuts for formatting
- Auto table of contents
- Auto-complete for links
-
Code Spell Checker
- Catches typos
- Learns technical terms
- Multi-language support
-
Markdown Preview Enhanced
- Beautiful live preview
- Export to PDF/HTML
- Diagram support (Mermaid, PlantUML)
-
Grammarly (unofficial)
- Grammar and style checking
- Tone detection
- Clarity suggestions
-
Markdown Lint (markdownlint)
- Enforces consistent style
- Configurable rules
- Auto-fix common issues
-
Paste Image
- Paste screenshots directly
- Auto-saves to /images folder
- Inserts markdown link
-
Draw.io Integration
- Create diagrams in VS Code
- Export as PNG/SVG
- Version control friendly
**VS Code settings for technical writing:**

```json
{
  // Editor settings
  "editor.wordWrap": "on",
  "editor.wrappingIndent": "same",
  "editor.rulers": [80, 120],

  // Markdown specific
  "[markdown]": {
    "editor.defaultFormatter": "yzhang.markdown-all-in-one",
    "editor.formatOnSave": true,
    "editor.quickSuggestions": true
  },

  // Spell checker
  "cSpell.language": "en,en-US",
  "cSpell.enableFiletypes": [
    "markdown",
    "mdx"
  ],
  "cSpell.userWords": [
    "API",
    "backend",
    "frontend",
    // Add your tech terms here
  ],

  // Markdown lint rules
  "markdownlint.config": {
    "MD013": false, // Line length (we use word wrap)
    "MD033": false, // Allow inline HTML
    "MD041": false  // First line doesn't need to be h1
  }
}
Option 2: Obsidian (The Knowledge Base Approach)
Why it’s powerful for documentation:
- Bidirectional linking (connect related docs)
- Graph view (visualize documentation structure)
- Templates (reuse common patterns)
- Local-first (your docs, your control)
Use Obsidian when:
- Building a knowledge base (internal wiki)
- Documenting interconnected concepts
- Need to see relationships between docs
- Want non-linear organization
Use VS Code when:
- Writing API docs that live with code
- Need Git workflow integration
- Documentation is part of codebase
- Team already uses VS Code
Option 3: Notion (The Team Collaboration Tool)
Why teams use it:
- Beautiful UI (non-technical stakeholders love it)
- Real-time collaboration
- Databases and tables built-in
- Easy to organize
Downsides:
- Not markdown-native (export is imperfect)
- No version control
- Can’t work offline reliably
- Vendor lock-in
Best for:
- Product requirements documents
- Team wikis
- Meeting notes
- High-level architecture docs
Not ideal for:
- API documentation (needs to be in codebase)
- Code examples (formatting issues)
- Docs that need version control
Layer 2: Markdown Mastery
Markdown is the universal format for technical writing. Master it.
Extended Markdown Features
Beyond basic markdown, learn these extensions:
1. GitHub Flavored Markdown (GFM)
## Tables

| Feature  | Supported | Notes   |
| -------- | --------- | ------- |
| Tables   | ✅        | GFM     |
| Diagrams | ✅        | Mermaid |

## Task Lists

- [x] Write introduction
- [x] Document API endpoints
- [ ] Add code examples
- [ ] Review and publish

## Code Blocks with Syntax Highlighting

```javascript
// Specify language for highlighting
function greet(name) {
  console.log(`Hello, ${name}!`);
}
```
Footnotes
Here’s a sentence with a footnote1.
Strikethrough
This text is wrong This text is correct.
**2. Mermaid Diagrams (In Markdown)**

```markdown
## Architecture Diagram

```mermaid
graph TD
    A[Client] -->|HTTPS| B[Load Balancer]
    B --> C[API Server 1]
    B --> D[API Server 2]
    C --> E[Database]
    D --> E
    E --> F[Redis Cache]
Sequence Diagram
sequenceDiagram
    participant U as User
    participant A as API
    participant D as Database

    U->>A: POST /login
    A->>D: Query user
    D-->>A: User data
    A-->>U: JWT token
These diagrams:
- Render in most modern markdown viewers
- Version control friendly (text-based)
- Easy to update
- No need for external diagram tools

**3. Math Equations (KaTeX/LaTeX)**

```markdown
Inline math: $E = mc^2$

Block math:
$$
\int_{-\infty}^{\infty} e^{-x^2} dx = \sqrt{\pi}
$$
Useful for:
- Algorithm complexity docs
- Data science documentation
- Mathematical formulas in APIs
Layer 3: The Complete Markdown Toolchain
Here’s a production-ready markdown workflow:
my-project/
├── docs/
│   ├── .vscode/
│   │   └── settings.json    # VS Code config
│   ├── getting-started/
│   │   ├── installation.md
│   │   └── quickstart.md
│   ├── api/
│   │   ├── authentication.md
│   │   └── endpoints.md
│   ├── images/
│   │   ├── architecture.png
│   │   └── flow-diagram.png
│   ├── .markdownlint.json   # Markdown style rules
│   ├── dictionary.txt       # Custom spell check words
│   └── README.md            # Documentation index
├── src/                     # Your actual code
└── package.json
✍️ Part 3: Writing Techniques - Grammar, Style, and Clarity
Great documentation isn’t just about what you say. It’s about how you say it.
The Three Principles of Technical Writing
Principle 1: Clarity Over Cleverness
❌ Bad (clever but unclear):
"Leverage the RESTful paradigm to facilitate CRUD operations"

✅ Good (clear and simple):
"Use the REST API to create, read, update, and delete data"
Rules for clarity:
-
Use Simple Words
❌ utilize → ✅ use ❌ facilitate → ✅ help ❌ commence → ✅ start ❌ terminate → ✅ end ❌ instantiate → ✅ create -
Avoid Jargon (Unless Necessary)
❌ "The idempotent endpoint leverages memoization" ✅ "The API caches results so repeated calls return the same data" But when jargon is standard, use it: ✅ "This function is idempotent" (Better than: "This function can be called multiple times safely") -
Be Specific
❌ "The API is fast"
✅ "The API responds in under 100ms for 95% of requests"

❌ "Use a strong password"
✅ "Use a password with at least 12 characters, including uppercase, lowercase, numbers, and symbols"
Principle 2: Active Voice Over Passive Voice
❌ Passive (unclear who does what):
"The data is processed by the system"
"An error will be thrown"
"The file should be uploaded"

✅ Active (clear actor and action):
"The system processes the data"
"The API throws an error"
"You should upload the file"
Why active voice matters:
- Clearer responsibility (who does what)
- Shorter sentences
- More engaging to read
When passive is okay:
- When the actor doesn’t matter: “Data is encrypted at rest”
- When you want to emphasize the action: “Backups are created daily”
Principle 3: Structure for Scanning
Most people scan documentation, they don’t read every word.
Make scanning easy:
❌ Bad (wall of text):
To authenticate with the API you need to include your API key in the Authorization header using the Bearer scheme and the key should be prefixed with the string sk_live or sk_test depending on whether you're in production or test mode and you can get your API key from the dashboard under Settings > API Keys and make sure to never commit your secret key to version control.

✅ Good (structured for scanning):

## Authentication

Include your API key in the `Authorization` header:

```bash
Authorization: Bearer YOUR_API_KEY
```
API Key Format
- Production keys:
sk_live_... - Test keys:
sk_test_...
Getting Your API Key
- Go to dashboard
- Navigate to Settings > API Keys
- Copy your key
⚠️ Never commit your secret key to version control
**Scanning techniques:**

1. **Use Headings Generously**
   ```markdown
   ## Main Section
   ### Subsection
   #### Detail

Rule: Reader should understand structure from headings alone-
Use Lists
✅ When to use bullet lists: - Items have no specific order - All items are equally important - You're listing features or options ✅ When to use numbered lists: 1. Steps must be done in order 2. Order matters (rankings) 3. You'll refer to specific steps later -
Use Visual Emphasis
**Bold** for emphasis
`code` for technical terms

> Blockquotes for important notes

⚠️ Warning symbols for gotchas
✅ Checkmarks for verified facts
❌ X marks for don't do this
💡 Lightbulb for tips
Grammar Patterns for Technical Writing
Pattern 1: Present Tense for Documentation
❌ Future tense (creates distance):
"The function will return a value"
"You will need to install Node.js"

✅ Present tense (immediate and clear):
"The function returns a value"
"You need to install Node.js"
Exception: Use future tense for actual future events:
- ✅ “The API will be deprecated in v3.0”
- ✅ “This feature will be released next month”
Pattern 2: Second Person for Instructions
❌ Third person (feels academic):
"One should configure the database connection"
"The developer must set environment variables"

✅ Second person (direct and personal):
"You should configure the database connection"
"You must set environment variables"

Or even better, imperative:
"Configure the database connection"
"Set environment variables"
Pattern 3: Short Sentences
❌ Long sentence (hard to parse):
"When you're ready to deploy your application to production you should make sure that all environment variables are properly set and that your database migrations have been run and that your tests are passing and that you've notified the team."

✅ Short sentences (easy to understand):
"When you're ready to deploy, check these items:
- Environment variables are set correctly
- Database migrations have run
- All tests pass
- Team has been notified"
Rule: Keep sentences under 25 words. If longer, break into multiple sentences.
Pattern 4: Consistent Terminology
❌ Inconsistent (confusing):
"Click the button"
"Press the submit control"
"Tap the action element"

✅ Consistent (clear):
"Click the button"
"Click the submit button"
"Click the action button"
Create a terminology guide:
## Terminology Guide

| Use This  | Not This                       |
| --------- | ------------------------------ |
| API key   | auth token, secret, credential |
| endpoint  | route, path, URL               |
| parameter | argument, option, setting      |
| response  | result, output, return         |
| error     | exception, failure, issue      |
Common Technical Writing Mistakes (And How to Fix Them)
Mistake 1: Assuming Knowledge
❌ Bad (assumes too much):
"Install the dependencies with npm"

Reader thinks: "What's npm? How do I install it?"

✅ Good (provides context):
"Install the dependencies using npm (Node Package Manager):
```bash
npm install
If you don’t have npm installed, see Installing Node.js.”
#### Mistake 2: Not Showing Expected Output
❌ Bad: “Run the test command”
✅ Good: “Run the test command:
npm testExpected output:
✓ User authentication tests (3)
✓ Payment processing tests (5)
✓ API endpoint tests (12)

20 tests passed in 2.3s
```"
Mistake 3: Missing Error Documentation
❌ Bad:
"Call the API endpoint"

✅ Good:
"Call the API endpoint:
```bash
curl https://api.example.com/users
Possible errors:
401 Unauthorized: Your API key is invalid429 Too Many Requests: You’ve exceeded rate limit (100 req/min)500 Internal Server Error: Service issue, try again or contact support”
#### Mistake 4: No Examples
❌ Bad (abstract): “The function accepts a configuration object with optional parameters”
✅ Good (concrete): “The function accepts a configuration object:
createUser({
  name: 'John Doe',      // required
  email: 'john@example.com', // required
  age: 30,               // optional
  country: 'US'          // optional, defaults to 'US'
})
```"
The Technical Writing Checklist
Before publishing any documentation, check:
## Clarity Checklist

- [ ] Every sentence has a clear subject and verb
- [ ] No sentence is over 25 words
- [ ] Technical terms are defined on first use
- [ ] Acronyms are spelled out on first use
- [ ] No jargon that could be replaced with simple words

## Structure Checklist

- [ ] Headings create clear hierarchy
- [ ] Related information is grouped together
- [ ] Important warnings are visually emphasized
- [ ] Code examples are syntax-highlighted
- [ ] Lists are used instead of long paragraphs

## Completeness Checklist

- [ ] Prerequisites are listed
- [ ] Every step is numbered
- [ ] Expected outputs are shown
- [ ] Common errors are documented
- [ ] Next steps are provided

## Accuracy Checklist

- [ ] All code examples have been tested
- [ ] All commands have been verified
- [ ] Links work and go to correct pages
- [ ] Screenshots are current (not outdated)
- [ ] Version numbers are up to date

## Audience Checklist

- [ ] Assumes appropriate knowledge level
- [ ] Provides context where needed
- [ ] Explains "why" not just "how"
- [ ] Includes examples for common use cases
- [ ] Links to related documentation
🤖 Part 4: Automated Documentation Generation
The best documentation is generated from your code. Here’s how.
Why Automate Documentation?
Manual documentation problems:
- Gets out of sync with code
- Developers forget to update it
- Inconsistent formatting
- Time-consuming to maintain

Automated documentation benefits:
- Always in sync (generated from code)
- Consistent format (same tool)
- Less developer time (tool does the work)
- Enforces code documentation (no docs = no generation)
Method 1: JSDoc for JavaScript/TypeScript
JSDoc turns code comments into beautiful API documentation.
Installation:
npm install --save-dev jsdoc
# or for TypeScript
npm install --save-dev typedoc
Writing JSDoc comments:
/**
 * Calculates the total price including tax.
 *
 * @param {number} price - The base price in dollars
 * @param {number} taxRate - Tax rate as decimal (e.g., 0.08 for 8%)
 * @param {Object} options - Optional configuration
 * @param {boolean} [options.roundUp=false] - Round up to nearest cent
 * @param {string} [options.currency='USD'] - Currency code
 * @returns {number} Total price including tax
 * @throws {Error} If price is negative
 * @example
 * // Calculate price with 8% tax
 * calculateTotal(100, 0.08)
 * // Returns: 108
 *
 * @example
 * // Round up to nearest cent
 * calculateTotal(99.99, 0.08, { roundUp: true })
 * // Returns: 108.00
 */
function calculateTotal(price, taxRate, options = {}) {
  if (price < 0) {
    throw new Error("Price cannot be negative");
  }

  const { roundUp = false, currency = "USD" } = options;
  let total = price * (1 + taxRate);

  if (roundUp) {
    total = Math.ceil(total * 100) / 100;
  }

  return total;
}
JSDoc tags reference:
/**
 * @param {Type} name - Description
 * @param {Type} [optionalParam] - Optional parameter
 * @param {Type} [paramWithDefault=value] - Has default value
 *
 * @returns {Type} Description
 * @throws {ErrorType} When error occurs
 *
 * @example
 * Code example here
 *
 * @see {@link OtherFunction} - Link to related function
 * @deprecated Use newFunction() instead
 * @since 1.2.0
 *
 * @typedef {Object} CustomType - Define custom type
 * @property {string} name - Property description
 * @property {number} age - Another property
 */
Generating HTML docs:
# Create jsdoc.json config
{
  "source": {
    "include": ["src"],
    "includePattern": ".js$"
  },
  "opts": {
    "destination": "./docs",
    "recurse": true,
    "readme": "./README.md"
  },
  "plugins": ["plugins/markdown"],
  "templates": {
    "cleverLinks": true,
    "monospaceLinks": false
  }
}

# Generate docs
npx jsdoc -c jsdoc.json
Method 2: TypeDoc for TypeScript
TypeDoc is JSDoc but type-aware for TypeScript.
Installation:
npm install --save-dev typedocTypeScript with TypeDoc:
/**
 * User authentication service
 * @module Authentication
 */

/**
 * User credentials for login
 */
interface LoginCredentials {
  /** User's email address */
  email: string;
  /** User's password (will be hashed) */
  password: string;
  /** Optional 2FA code */
  twoFactorCode?: string;
}

/**
 * Result of login attempt
 */
interface LoginResult {
  /** Whether login was successful */
  success: boolean;
  /** JWT token if successful */
  token?: string;
  /** Error message if failed */
  error?: string;
}

/**
 * Authenticates a user with email and password.
 *
 * @param credentials - Login credentials
 * @returns Promise resolving to login result
 * @throws {AuthenticationError} If credentials are invalid
 *
 * @example
 * ```typescript
 * const result = await login({
 *   email: 'user@example.com',
 *   password: 'secret123'
 * });
 *
 * if (result.success) {
 *   console.log('Token:', result.token);
 * }
 * ```
 */
async function login(credentials: LoginCredentials): Promise<LoginResult> {
  // Implementation
}
Generate TypeDoc documentation:
# Add to package.json
{
  "scripts": {
    "docs": "typedoc --out docs src/index.ts"
  }
}

# Run
npm run docs
TypeDoc configuration (typedoc.json):
{
  "entryPoints": ["src/index.ts"],
  "out": "docs",
  "excludePrivate": true,
  "excludeProtected": false,
  "theme": "default",
  "readme": "README.md",
  "plugin": ["typedoc-plugin-markdown"]
}
Method 3: OpenAPI/Swagger for REST APIs
Swagger/OpenAPI generates interactive API documentation.
Installation:
npm install swagger-jsdoc swagger-ui-expressDocument your API in code:
const express = require("express");
const swaggerJsdoc = require("swagger-jsdoc");
const swaggerUi = require("swagger-ui-express");

const app = express();

// Swagger definition
const swaggerOptions = {
  definition: {
    openapi: "3.0.0",
    info: {
      title: "User API",
      version: "1.0.0",
      description: "User management API",
    },
    servers: [
      {
        url: "http://localhost:3000",
        description: "Development server",
      },
    ],
  },
  apis: ["./routes/*.js"], // Path to API routes
};

const swaggerSpec = swaggerJsdoc(swaggerOptions);

// Serve Swagger UI
app.use("/api-docs", swaggerUi.serve, swaggerUi.setup(swaggerSpec));

/**
 * @swagger
 * components:
 *   schemas:
 *     User:
 *       type: object
 *       required:
 *         - email
 *         - password
 *       properties:
 *         id:
 *           type: string
 *           description: Auto-generated user ID
 *         email:
 *           type: string
 *           format: email
 *           description: User's email address
 *         name:
 *           type: string
 *           description: User's full name
 *         created_at:
 *           type: string
 *           format: date-time
 *           description: Account creation timestamp
 *       example:
 *         id: usr_abc123
 *         email: john@example.com
 *         name: John Doe
 *         created_at: 2026-01-11T10:30:00Z
 */

/**
 * @swagger
 * /api/users:
 *   post:
 *     summary: Create a new user
 *     tags: [Users]
 *     requestBody:
 *       required: true
 *       content:
 *         application/json:
 *           schema:
 *             type: object
 *             required:
 *               - email
 *               - password
 *             properties:
 *               email:
 *                 type: string
 *                 format: email
 *               password:
 *                 type: string
 *                 minLength: 8
 *               name:
 *                 type: string
 *     responses:
 *       201:
 *         description: User created successfully
 *         content:
 *           application/json:
 *             schema:
 *               $ref: '#/components/schemas/User'
 *       400:
 *         description: Invalid request body
 *       409:
 *         description: Email already exists
 */
app.post("/api/users", async (req, res) => {
  // Implementation
});

app.listen(3000, () => {
  console.log("API docs available at http://localhost:3000/api-docs");
});
Benefits of Swagger:
- Interactive docs (try API in browser)
- Auto-generated client SDKs
- API validation
- Always in sync with code
Method 4: Go Documentation (godoc)
Go has documentation built into the language.
Writing Go docs:
// Package user provides user management functionality.
//
// This package handles user authentication, authorization,
// and profile management.
package user

// User represents a registered user in the system.
//
// All users must have a unique email address.
// Passwords are hashed using bcrypt before storage.
type User struct {
	// ID is the unique identifier for this user
	ID string

	// Email is the user's email address (unique)
	Email string

	// Name is the user's display name
	Name string

	// CreatedAt is when the account was created
	CreatedAt time.Time
}

// Authenticate verifies user credentials and returns a session token.
//
// The password is compared against the stored hash using constant-time
// comparison to prevent timing attacks.
//
// Example:
//
//	token, err := Authenticate("user@example.com", "password123")
//	if err != nil {
//		log.Fatal(err)
//	}
//	fmt.Println("Token:", token)
//
// Returns an error if:
//   - Email doesn't exist
//   - Password is incorrect
//   - Account is suspended
func Authenticate(email, password string) (string, error) {
	// Implementation
}
Generate Go documentation:
# View in browser
go doc -http=:6060
# Then visit http://localhost:6060/pkg/yourpackage/

# Or view in terminal
go doc user.Authenticate
Method 5: README Generation with Tools
Using readme-md-generator:
npx readme-md-generatorThis prompts you for project details and generates:
<h1 align="center">Welcome to my-project 👋</h1>
<p>
  <img alt="Version" src="https://img.shields.io/badge/version-1.0.0-blue.svg?cacheSeconds=2592000" />
  <a href="https://github.com/youruser/my-project#readme" target="_blank">
    <img alt="Documentation" src="https://img.shields.io/badge/documentation-yes-brightgreen.svg" />
  </a>
  <a href="https://github.com/youruser/my-project/graphs/commit-activity" target="_blank">
    <img alt="Maintenance" src="https://img.shields.io/badge/Maintained%3F-yes-green.svg" />
  </a>
</p>

> A modern web application for managing tasks

## Install

\```sh
npm install
\```

## Usage

\```sh
npm run start
\```

## Run tests

\```sh
npm run test
\```

## Author

👤 **Your Name**

- Website: https://yourwebsite.com
- GitHub: [@youruser](https://github.com/youruser)

## 📝 License

This project is [MIT](https://github.com/youruser/my-project/blob/master/LICENSE) licensed.
Automating Documentation in CI/CD
GitHub Actions workflow for docs:
# .github/workflows/docs.yml
name: Generate Documentation

on:
  push:
    branches: [main]
  pull_request:
    branches: [main]

jobs:
  docs:
    runs-on: ubuntu-latest

    steps:
      - uses: actions/checkout@v3

      - name: Setup Node.js
        uses: actions/setup-node@v3
        with:
          node-version: "18"

      - name: Install dependencies
        run: npm ci

      - name: Generate API docs
        run: npm run docs

      - name: Check for outdated docs
        run: |
          if git diff --exit-code docs/; then
            echo "✅ Documentation is up to date"
          else
            echo "❌ Documentation is outdated"
            echo "Run 'npm run docs' and commit changes"
            exit 1
          fi

      - name: Deploy to GitHub Pages
        if: github.ref == 'refs/heads/main'
        uses: peaceiris/actions-gh-pages@v3
        with:
          github_token: ${{ secrets.GITHUB_TOKEN }}
          publish_dir: ./docs
This ensures:
- Docs are generated on every push
- Outdated docs fail CI
- Docs are automatically deployed
📄 Part 5: Multi-Format Documentation Output
One source, multiple formats. Here’s how to generate slides, PDFs, Word docs, and more from Markdown.
The Pandoc Powerhouse
Pandoc converts between almost any document format.
Installation:
# macOS
brew install pandoc

# Ubuntu/Debian
sudo apt install pandoc

# Windows
choco install pandoc
Markdown → PDF:
pandoc input.md -o output.pdf \
  --pdf-engine=xelatex \
  --toc \
  --number-sections \
  -V geometry:margin=1in
Markdown → Word (docx):
pandoc input.md -o output.docx \
  --reference-doc=custom-template.docx \
  --toc
Markdown → HTML:
pandoc input.md -o output.html \
  --standalone \
  --css=style.css \
  --toc
Markdown → Slides (reveal.js):
pandoc slides.md -o presentation.html \
  -t revealjs \
  --standalone \
  --slide-level=2 \
  -V theme=black
Creating Presentation Slides from Markdown
Using Marp (Markdown Presentation Ecosystem):
# Install Marp CLI
npm install -g @marp-team/marp-cli
Markdown slides:
---
marp: true
theme: default
paginate: true
---

# Technical Writing for Developers

Your Name
2026-01-11

---

## Why Documentation Matters

- Onboarding new developers
- Reducing support burden
- Knowledge preservation
- API adoption

---

## Types of Documentation

1. **Code Comments**

   - In-line explanations
   - Function documentation

2. **API Docs**

   - Endpoint reference
   - Authentication guides

3. **Architecture Docs**
   - System design
   - Decision records

---

## Code Example

```javascript
/**
 * Authenticates user credentials
 * @param {string} email
 * @param {string} password
 * @returns {Promise<string>} JWT token
 */
async function login(email, password) {
  // Implementation
}
```
Best Practices
“Code is read more often than it is written”
- Write for your future self
- Keep docs close to code
- Automate where possible
- Test your examples
Questions?
Contact: your@email.com GitHub: @yourhandle
**Generate slides:**

```bash
# HTML slides
marp slides.md -o presentation.html

# PDF slides
marp slides.md -o presentation.pdf

# PowerPoint
marp slides.md -o presentation.pptx

# Watch mode (auto-reload)
marp -w slides.md
Documentation Site Generators
Option 1: Docusaurus (React-based)
npx create-docusaurus@latest my-docs classic
cd my-docs
npm start
Structure:
my-docs/
├── docs/
│   ├── intro.md
│   ├── tutorial/
│   └── api/
├── blog/
├── src/
│   └── pages/
├── static/
│   └── img/
└── docusaurus.config.js
Features:
- Versioning support
- Search built-in
- Dark mode
- Markdown + React components
Option 2: MkDocs (Python-based)
pip install mkdocs mkdocs-material
mkdocs new my-docs
cd my-docs
mkdocs serve
Configuration (mkdocs.yml):
site_name: My Documentation
theme:
  name: material
  palette:
    primary: indigo
  features:
    - navigation.tabs
    - toc.integrate

nav:
  - Home: index.md
  - Getting Started:
      - Installation: getting-started/installation.md
      - Quick Start: getting-started/quickstart.md
  - API Reference:
      - Authentication: api/auth.md
      - Endpoints: api/endpoints.md

plugins:
  - search
  - minify
Option 3: VitePress (Vue-based)
npm init vitepress@latestSimple and fast:
---

# .vitepress/config.js

export default {
title: 'My Documentation',
description: 'Technical docs for my project',
themeConfig: {
nav: [
{ text: 'Guide', link: '/guide/' },
{ text: 'API', link: '/api/' }
],
sidebar: {
'/guide/': [
{
text: 'Introduction',
items: [
{ text: 'Getting Started', link: '/guide/getting-started' },
{ text: 'Installation', link: '/guide/installation' }
]
}
]
}
}
}
Exporting to Different Formats Workflow
Complete conversion script:
#!/bin/bash
# generate-all-formats.sh

INPUT="documentation.md"
OUTPUT_DIR="output"

mkdir -p $OUTPUT_DIR

echo "Generating documentation in multiple formats..."

# PDF
pandoc $INPUT -o $OUTPUT_DIR/documentation.pdf \
  --pdf-engine=xelatex \
  --toc \
  --number-sections \
  -V geometry:margin=1in \
  --highlight-style=tango

# Word
pandoc $INPUT -o $OUTPUT_DIR/documentation.docx \
  --toc \
  --number-sections

# HTML
pandoc $INPUT -o $OUTPUT_DIR/documentation.html \
  --standalone \
  --toc \
  --css=styles.css \
  --highlight-style=tango

# Slides
pandoc $INPUT -o $OUTPUT_DIR/presentation.html \
  -t revealjs \
  --standalone \
  --slide-level=2 \
  -V theme=moon

# EPUB (e-book)
pandoc $INPUT -o $OUTPUT_DIR/documentation.epub \
  --toc \
  --epub-cover-image=cover.png

echo "✅ All formats generated in $OUTPUT_DIR/"
Make it executable and run:
chmod +x generate-all-formats.sh
./generate-all-formats.sh
🌍 Part 6: Multi-Language Documentation Strategy
Managing documentation in multiple languages at scale.
Strategy 1: File-Based Separation
Directory structure:
docs/
├── en/
│   ├── getting-started.md
│   ├── api-reference.md
│   └── tutorials.md
├── es/
│   ├── getting-started.md
│   ├── api-reference.md
│   └── tutorials.md
├── fr/
│   ├── getting-started.md
│   ├── api-reference.md
│   └── tutorials.md
└── README.md (language selector)
Benefits:
- Simple to understand
- Easy to version control
- Clear ownership per language
Challenges:
- Manual synchronization
- Easy to miss updates
- No translation memory
Strategy 2: i18n with Metadata
Markdown with frontmatter:
---
title: "Getting Started"
lang: en
translations:
  es: /es/getting-started
  fr: /fr/getting-started
lastUpdated: 2026-01-11
---

# Getting Started

Content here...
Spanish version:
---
title: "Comenzando"
lang: es
translations:
  en: /en/getting-started
  fr: /fr/getting-started
lastUpdated: 2026-01-11
---

# Comenzando

Contenido aquí...
Strategy 3: Using Translation Services
Crowdin Integration
# crowdin.yml
project_id: "123456"
api_token_env: CROWDIN_TOKEN

files:
  - source: /docs/en/**/*.md
    translation: /docs/%two_letters_code%/**/%original_file_name%
    ignore:
      - /docs/en/internal/**
Workflow:
- Write docs in English
- Push to Crowdin
- Translators work on Crowdin
- Pull translations back to repo
DeepL API for Machine Translation
const fetch = require("node-fetch");

async function translateMarkdown(text, targetLang) {
  const response = await fetch("https://api-free.deepl.com/v2/translate", {
    method: "POST",
    headers: {
      Authorization: `DeepL-Auth-Key ${process.env.DEEPL_API_KEY}`,
      "Content-Type": "application/json",
    },
    body: JSON.stringify({
      text: [text],
      target_lang: targetLang.toUpperCase(),
      preserve_formatting: true,
      tag_handling: "xml",
    }),
  });

  const data = await response.json();
  return data.translations[0].text;
}

// Usage
const englishDoc = fs.readFileSync("docs/en/getting-started.md", "utf8");
const spanishDoc = await translateMarkdown(englishDoc, "ES");
fs.writeFileSync("docs/es/getting-started.md", spanishDoc);
Managing Code Examples Across Languages
Problem: Code examples in different spoken languages
<!-- English version -->

## Creating a User

```javascript
// Create a new user
const user = await createUser({
  name: "John Doe",
  email: "john@example.com",
});
```
Creando un Usuario
// Crear un nuevo usuario
const usuario = await crearUsuario({
  nombre: "Juan Pérez",
  email: "juan@example.com",
});
**Solution:** Keep code in English, translate comments:

```markdown
<!-- Spanish version with English code -->
## Creando un Usuario

```javascript
// Crear un nuevo usuario (code stays in English)
const user = await createUser({
  name: 'Juan Pérez',
  email: 'juan@example.com'
});
### Translation Checklist

```markdown
## Before Translating
- [ ] Source document is finalized
- [ ] Code examples are tested
- [ ] Screenshots are language-neutral
- [ ] Links point to translatable content

## During Translation
- [ ] Preserve markdown formatting
- [ ] Keep code examples in English
- [ ] Translate code comments
- [ ] Adapt examples to local context (names, addresses)
- [ ] Preserve technical terminology

## After Translation
- [ ] Links work in target language
- [ ] Formatting renders correctly
- [ ] Code examples still work
- [ ] Native speaker review
- [ ] Add to translation index
🎯 Part 7: Putting It All Together - A Complete Documentation Workflow
Let’s combine everything into a production-ready workflow.
The Complete Technical Writing Stack
Layer 1: Writing Environment
├── VS Code with extensions
├── Markdown linting
└── Grammar checking

Layer 2: Version Control
├── Git for documentation
├── Pull request reviews
└── Change tracking

Layer 3: Automated Generation
├── JSDoc/TypeDoc for code
├── Swagger for APIs
└── CI/CD pipeline

Layer 4: Multi-Format Export
├── Pandoc for conversions
├── Marp for slides
└── Static site generator

Layer 5: Distribution
├── GitHub Pages / Netlify
├── Internal wiki
└── PDF downloads

Layer 6: Maintenance
├── Automated link checking
├── Spell checking in CI
└── Translation management
Sample Documentation Repository Structure
my-project/
├── docs/
│   ├── .vscode/
│   │   └── settings.json
│   ├── en/
│   │   ├── getting-started/
│   │   │   ├── installation.md
│   │   │   └── quickstart.md
│   │   ├── api/
│   │   │   ├── authentication.md
│   │   │   └── endpoints/
│   │   ├── guides/
│   │   │   ├── deployment.md
│   │   │   └── troubleshooting.md
│   │   └── architecture/
│   │       ├── overview.md
│   │       └── adr/
│   │           ├── 001-database-choice.md
│   │           └── 002-authentication-strategy.md
│   ├── es/
│   │   └── (same structure)
│   ├── images/
│   │   ├── architecture/
│   │   └── screenshots/
│   ├── templates/
│   │   ├── adr-template.md
│   │   ├── runbook-template.md
│   │   └── tutorial-template.md
│   ├── .markdownlint.json
│   ├── .spelling
│   └── README.md
├── src/
│   └── (your code with JSDoc comments)
├── .github/
│   └── workflows/
│       ├── docs-build.yml
│       ├── docs-deploy.yml
│       └── link-check.yml
├── scripts/
│   ├── generate-docs.sh
│   └── validate-docs.sh
└── package.json
Complete CI/CD for Documentation
# .github/workflows/docs.yml
name: Documentation Pipeline

on:
  push:
    branches: [main]
    paths:
      - "docs/**"
      - "src/**/*.js"
  pull_request:
    branches: [main]

jobs:
  lint:
    name: Lint Documentation
    runs-on: ubuntu-latest
    steps:
      - uses: actions/checkout@v3

      - name: Markdown Lint
        uses: articulate/actions-markdownlint@v1
        with:
          config: docs/.markdownlint.json
          files: "docs/**/*.md"

      - name: Spell Check
        uses: rojopolis/spellcheck-github-actions@v0
        with:
          config_path: docs/.spellcheck.yml

  test:
    name: Test Code Examples
    runs-on: ubuntu-latest
    steps:
      - uses: actions/checkout@v3

      - name: Extract and test code examples
        run: |
          npm install
          npm run test-docs-examples

  generate:
    name: Generate Documentation
    runs-on: ubuntu-latest
    needs: [lint, test]
    steps:
      - uses: actions/checkout@v3

      - name: Setup Node.js
        uses: actions/setup-node@v3
        with:
          node-version: "18"

      - name: Install dependencies
        run: npm ci

      - name: Generate API docs
        run: npm run docs:api

      - name: Build documentation site
        run: npm run docs:build

      - name: Check links
        uses: gaurav-nelson/github-action-markdown-link-check@v1
        with:
          use-quiet-mode: "yes"

      - name: Upload artifacts
        uses: actions/upload-artifact@v3
        with:
          name: documentation
          path: docs/build/

  deploy:
    name: Deploy Documentation
    runs-on: ubuntu-latest
    needs: generate
    if: github.ref == 'refs/heads/main'
    steps:
      - name: Download artifacts
        uses: actions/download-artifact@v3
        with:
          name: documentation
          path: docs/build/

      - name: Deploy to GitHub Pages
        uses: peaceiris/actions-gh-pages@v3
        with:
          github_token: ${{ secrets.GITHUB_TOKEN }}
          publish_dir: ./docs/build
          cname: docs.yourproject.com
Final Best Practices Checklist
## Documentation Excellence Checklist

### Content Quality

- [ ] Clear purpose for each document
- [ ] Appropriate audience level
- [ ] Tested code examples
- [ ] Current screenshots
- [ ] Working links

### Structure

- [ ] Logical organization
- [ ] Consistent formatting
- [ ] Good heading hierarchy
- [ ] Table of contents for long docs
- [ ] Search-friendly titles

### Maintenance

- [ ] Update docs with code changes
- [ ] Review docs in PRs
- [ ] Automated validation
- [ ] Regular audits
- [ ] Deprecation notices

### Accessibility

- [ ] Alt text for images
- [ ] Descriptive link text
- [ ] High contrast examples
- [ ] Screen reader friendly
- [ ] Multiple format options

### Internationalization

- [ ] Translation strategy
- [ ] Language selector
- [ ] Localized examples
- [ ] Cultural sensitivity
- [ ] Consistent terminology
🎓 Conclusion: Becoming a Technical Writing Master
Technical writing is not a separate skill from programming. It’s part of being a great developer.
The Three Levels of Technical Writing Maturity
Level 1: Documenter
- Writes what code does
- Updates docs when reminded
- Documentation feels like a chore

Level 2: Communicator
- Explains why code exists
- Updates docs with every PR
- Documentation feels like teaching

Level 3: System Builder
- Creates documentation systems
- Automates doc generation
- Documentation feels like leverage
Your Action Plan
Week 1: Foundation
- Set up VS Code with documentation extensions
- Create a documentation template
- Write one excellent README
Week 2: Automation
- Add JSDoc/TypeDoc to your project
- Generate API documentation
- Set up automated doc generation
Week 3: Process
- Make docs part of your PR checklist
- Add documentation review to your team
- Create a style guide
Week 4: Scale
- Set up a documentation site
- Implement CI/CD for docs
- Train your team on best practices
Remember
“Documentation is a love letter that you write to your future self.” — Damian Conway
Good documentation is not optional. It’s how you show respect for:
- Your future self (who will forget why you made that decision)
- Your teammates (who need to understand your code)
- Your users (who need to integrate with your API)
- Your company (whose institutional knowledge depends on it)
Write documentation you would want to read. That’s the entire secret.
Related Resources:
- Writing Effective Documentation: From Code Comments to User Guides
- GitFlow + GitOps: Best Practices Guide
- The Complete Scrum + Agile Workflow
Written by a developer who learned that good documentation is the highest ROI activity in software development.
Let me mark the first task as complete and continue with the next sections:
<function_calls>
Footnotes
-
This is the footnote content. ↩